Wednesday, March 7, 2012

Alert Me button missing from SharePoint 2010 ribbon

In SharePoint 2010 List or Library view, if the button Alert Me is missing on the ribbon (it should be next to the button "Email a link" in the middle), it's because Outgoing Email is not configured on the farm. You can still add alerts by selecting View Properties on a list item or document, then click Alert Me at the top.

Labels: , ,

Thursday, January 26, 2012

Fix Mysterious 403 Forbidden error on SharePoint anonymous sites

While there're possibly many other permission related causes for the HTTP Status Code 403 Firbidden error on SharePoint anonymous sites, one in particular is very elusive and puzzling. If a page access terms from the metadata store, e.g. trying to get the Label of a TaxonomyFieldValue off a list item, it results in the 403 error.

The problem, as many people have pointed out, is that every site collection stores the metadata in its own hidden list called "TaxonomyHiddenList". It's at /Lists/TaxonomyHiddenList/allitems.aspx. This list by default has Anonymous access turned on:


However, something's missing but the UI's not showing. By simply click the OK button on the page above, it fixes the 403 erorr on pages that access the metadata in the site collection. So what does clicking the OK button actually do?

Behind the scene, the Anonymous Access of the list has only one permission: ViewListItems. When the OK button is clicked, it addes four more permissions to the permission set: OpenItems, ViewVersions, Open, UseClientIntegration. Apparently when reading TaxonomyFieldValue of a list item, some of these additional permissions are required.

In addition to manually click the OK button to fix the problem for a site collection, the following code snippet can fix the problem in the code:


SPBasePermissions newPer = SPBasePermissions.ViewListItems | SPBasePermissions.OpenItems | SPBasePermissions.ViewVersions | SPBasePermissions.Open | SPBasePermissions.UseClientIntegration;
SPList taxonomyHidden = rootweb.GetList("/sites/testSite/Lists/TaxonomyHiddenList");
taxonomyHidden.AnonymousPermMask64 = newPer;


Or better, get the Guest user's permissions on the site, and then add the additional permissions necessary:


SPBasePermissions currentPer = rootweb.RoleDefinitions.GetByType(SPRoleType.Guest).BasePermissions;
SPBasePermissions newPer = currentPer | SPBasePermissions.OpenItems | SPBasePermissions.ViewVersions | SPBasePermissions.Open | SPBasePermissions.UseClientIntegration;
SPList taxonomyHidden = rootweb.GetList("/sites/testSite/Lists/TaxonomyHiddenList");
taxonomyHidden.AnonymousPermMask64 = newPer;


Note that the code above uses the C# or operator (pipe) to assign mulitple permissions to the permission set. Run the code against the site collection in question and the 403 error would be fixed.

Labels: , , ,

Tuesday, January 24, 2012

When the Ribbons block webpart picker...

On customized SharePoint pages, particularly Search Center pages, very often you end up with something like this when trying to add web parts to the page:


Notice that some of the webparts and categories are blocked by the Ribbon. If the one you want is blocked, first add any one that's clickable, then click on Edit Web Part in the newly added webpart, once the Edit Panel shows up, click on the Add a Web Part link again, now the webpart picker control shows below both the Ribbon bar and the header bar:


Nothing is being blocked anymore. Add the webpart(s) you desire, and delete the very first one that you added in previous step if it's not needed.


Labels: , ,

Monday, January 23, 2012

SharePoint anonymous access permission

Came across a good explanation on what exact permissions that SharePoint anonymous access has:

"In SharePoint, anonymous users' rights are determined by the Limited Access permission level. Limited Access is a special permission level that cannot be assigned to a user or group directly. The reason it exists is because if you have a library or subsite that has broken permissions inheritance, and you give a user/group access to only that library/subsite, in order to view its contents, the user/group must have some access to the root web. Otherwise the user/group will be unable to browse the library/subsite, even though they have rights there, because there are things in the root web that are needed to render the site or library. Therefore, when you give a group permissions only to a subsite or library that is breaking permissions inheritance, SharePoint will automatically give Limited Access to that group or user on the root web.

......If you want to see what rights Limited Access is composed of in your site, go to http://SERVER/_layouts/role.aspx and click on Limited Access. "

For more descriptions, see the original post
http://blogs.msdn.com/b/ecm/archive/2007/05/12/anonymous-users-forms-pages-and-the-lockdown-feature.aspx

Labels: , , ,

Tuesday, August 2, 2011

Add non-page content types to SharePoint Publishing Pages library

There are cases when you need to add content types that're not Page based to the Publishing Portal's Pages library. Such content types do not even show up in the Available Site Content Types list on the AddContentTypeToList.aspx page. Notice that there not many items in the listbox:


You can have any content types added to the Pages library, just not from the UI above. I recently worked on a project that requires a rather narrative professional profile page that has most of the columns of the Contact content type. So naturally, the Professional Profile content type should inherit from Contact. There is of course a custom page layout associated with the content type for displaying the content. The way to add the Professional Profile content type to the Pages library is to create a page with the custom page layout. The page layout apparently forces the content type onto the library:


  1. In the Pages library, select New Document from the ribbon and then select Page to create a generic page


  2. On the "Create Page" page next, select the Page Layout "Professional Profile", instead of the default (Article Page) Body only.


  3. Once this page is created, the content type Professional Profile is on the library's content types now:


Labels: , , ,

Thursday, March 10, 2011

Customize Term Set error: The default termstore for this site cannot be identified

When creating a site column of type Managed Metadata, and selecting "Customize your term set" under the Term Set Settings section, an alert box may pop up with the error:


This is because there is not a Managed Metadata Service Connection set to be the default storage location for column specific term sets. To set one as the default storage location, go to Central Admin, Manage Service Applications, and find the Managed Metadata Service desired, select the "Connection" below it and click Properties in the ribbon:


On the Properties modal window, check the checkbox "This service application is the default storage location for column specific term sets:


Then a site column using custom term set within a site can be created.

Labels: , , , ,

Thursday, February 17, 2011

Issues with creating Managed Metadata Service application in Sharepoint 2010

There are two most common issues related to creating a Managed Metadata Service Application in SharePoint 2010 that I have seen.

Issue #1 No service applications actually created in IIS

This can happen whether you do it in the GUI (Central Admin -> Manage Service Applications -> New -> Managed Metadata Service) or in Powershell (New-SPMetadataServiceApplication). The command runs successfully but nothing is added in IIS. If you click on the newly created Metadata service application on the ServiceApplications.asps page in Central Admin, you get this error in red on the termstoremanager.aspx page:

The Managed Metadata Service or Connection is currently not available. The Application Pool or Managed Metadata Web Service may not have been started. Please Contact your Administrator.

The problem is actually right there in the error message: “Managed Metadata Web Service” has not been started. Many of the service application instances rely on their hosting Service. So the service must be running in order for the instances to be created properly. When you click New on the Manage Service Applications page in Central Admin (ServiceApplications.aspx) you are creating an instance of a service application. So where are the actual services or service hosts? They are on the “Services on Server” page (Central Admin -> Manage services on server” under System Settings). In the above metadata service error case, go there and start the “Managed Metadata Web Service”, and the previously created yet not working Metadata Service Application instance will start functioning properly and IIS will show a new virtual application created in the “SharePoint Web Services” website. If you chose to also create a new app pool, the app pool will also show up now.


Issue #2 The service application does not have a connection associated with Central Admin

This typically happens if you create a Metadata Service application using Powerscript with minimum optional parameters, for example:

New-SPMetadataServiceApplication -ApplicationPool "SharePoint Service App AP" -Name "Managed Metadata Service 1" -DatabaseName "SharePoint_MetadataService1DB" -DatabaseServer "USTFSPOC01"

New-SPMetadataServiceApplicationProxy -Name "Managed Metadata Service 1 Proxy" -ServiceApplication "Managed Metadata Service 1"

So a new Metadata Service application is created using an existing app pool, and a proxy is also created. However, if you go to Central Admin Manage Service Applications page and click the link on this Metadata Service application, you’d get the following error:

The Service Application being requested does not have a Connection associated with the Central Administration web application

The error is because the proxy was created without being associated with a proxy group. The Central Admin site uses the Default Proxy Group. Go to Central Admin -> Application Management -> Configure service application associations -> click the “default” link in the Application Proxy Group column, it should show that “Managed Metadata Service 1 Proxy” is not checked. Check it and click OK. Now go to Central Admin Manage Service Applications page again and click the link on this Metadata Service application, it should show up successfully.

Labels: , , , ,

Monday, November 8, 2010

SharePoint 2010 Remove Orphaned Application Pools

I was trying to create a new Managed Metadata Service Application (CA -> Manage Service Applications -> New dropdown (in the ribbon) -> Managed Metadata Service. I filled out the modal window and clicked OK. It all seemingly went through fine and the newly created Manage Service Application showed up in the list. However, it actually went seriously wrong in the backend. There was no database created in SQL Server and no application pool created in IIS. The problem, as logged in the Application Event Log, was because the Managed Metadata Web Service had not been started (CA -> Manage Services on Server).

Anyway, the problem now is that SharePoint thinks there's an application pool with the name but IIS does not have it. So the name is orphaned in SharePoint. It's not a problem if you don't ever select it but I'd like to keep things clean. so here's how to get rid of it:
  1. Go to the config db, run a query like "select * from Classes where FullName like '%pool%'". This gives you two records, one for regular web apps and one for service apps.
  2. Now run another query "select * from Objects where ClassId IN ('Id1FromAbove', 'Id2FromAbove'). This gives you the list of all application pool defs.
  3. Find the one with the orphaned name, and delete it (could have searched for this name directly but checking the IDs made sure the object is indeed the app pool).
Go back to CA and try to create a new Service Application, the orphaned app pool name is no longer in the dropdown. Of course editing the config database directly is often a no-no. hey, what else can I do, Microsoft?

Labels: , ,

Tuesday, November 2, 2010

The importance of owner for some registry keys - DCOM Launch and Activation

Very often application such as SharePoint Server and SQL Server are installed with the Administrator account right after an OS build in a dev/VM envrionment. Then the VM is joined to some domain, and you switch to use a domain account that's added to local Admin group. All is fine. From time to time, you may get a local activation permission error, like this one for SharePoint:

The application-specific permission settings do not grant Local Activation permission for the COM Server application with CLSID

{61738644-F196-11D0-9953-00C04FD919C1}

to the user \mossService SID (S-1-5-21-). This security permission can be modified using the Component Services administrative tool.


That GUID is the ID for IIS WAMREG Admin Service. So you go to Component Services -> Computers -> My Computer -> DCOM Config -> IIS WAMREG Admin Service -> Properties -> Secuirty tab, ! everything's grayed out! How do you change it?

The reason is that despite being logged in as an account with local admin access, the particular security registry key is readonly. THE correct way to make it writeable:

  1. Start regedit (please disable UAC, which is troublesome on server)
  2. Go to the key [HKEY_CLASSES_ROOT\AppID\{61738644-F196-11D0-9953-00C04FD919C1}] , or the key with the GUID that you're trying to modify.
  3. Right click on the key -> Permissions. If you select Administrators and click Full Control and Apply, it doesn't let you do it.
  4. Click on the Advanced button, go to the Owner tab, change to Administrators (or the currently logged in account, or another account/groups). OK
  5. Back on the Permissions window, now you can give the Administrators group Full Control.

After done the above, exit Component Services, and start it again, go to IIS WAMREG Admin Service, now you can change the settings of Local Activation etc.

Labels: , , , ,

Wednesday, September 8, 2010

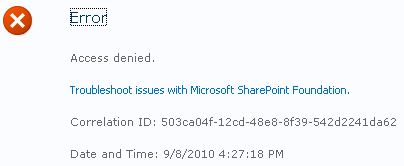
Access denied when deploying a solution in SharePoint

There are many posts about this issue but none applied to my situation. I was trying to deploy a solution that I know works, and it kept giving me "Access denied":

This was on a Windows 2008R2 machine and the user account I was using was an admin on everything. Turned out it's the annoying UAC issue again. Once I right clicked IE and did Run As Administrator, browsed to the Central Admin, and tried deploying the solution again, it worked successfully. UAC was preventing the changes to GAC, and maybe some other things too.

Labels: , , , ,